Ombre nails turn a straightforward manicure into a smooth wash of color that feels refined and current. Instead of a single shade from base to tip, the polish shifts gradually from one tone to another. The transition is gentle, so the finish looks calm and thoughtfully designed. It brings a mix of softness and impact that works for everyday wear and for celebrations.
This style adapts to nearly any personal taste. Subtle blends look clean and airy. Deeper mixes feel striking and dramatic. The effect complements short nails and long nails alike, and it pairs well with many shapes. That flexibility is a big reason the look remains in steady demand every year.
Why Ombre Nails Continue To Captivate
The strength of this approach is balance. It offers dimension without heavy decoration, and it adds interest without feeling loud. Gradients create a gentle shift that draws the eye along the nail in a way that feels soothing. That balance makes it easy to wear with casual outfits or evening looks.
People also love how adaptable the color story can be. A classic pale pink that drifts into off white gives a tidy finish that suits dressy events. Warmer blends like peach and petal pink bring a sunlit vibe that feels relaxed. Darker blends such as mulberry into aubergine, or crimson melting into inky tones, deliver drama that suits statement looks. Pastels offer calm energy, while bright neons give playful character. Because the gradient relies on harmony between shades, you can tweak the intensity to match any mood.
Another reason the trend endures is how flattering it can be across skin tones. Soft neutrals appear fresh on fair complexions. Warm blends glow on medium tones. Saturated hues look radiant on deeper skin. Since the fade covers the full nail, the transition can be tuned to complement undertones, which helps the design feel custom rather than one note.
The gradient also suits many nail shapes. Square tips feel tidy and modern. Almond silhouettes read as graceful. Coffin shapes emphasize length and bring a bolder attitude. Oval nails look balanced and refined. The blended color enhances the curve or line of each shape by guiding attention from the base to the tip.
Color Combinations That Always Work
Choosing the right pair, or trio, of shades is the key to a smooth shift. The closer the tones sit on the color wheel or within a color family, the more seamless the blend tends to look. If you prefer noticeable contrast, keep the middle of the nail soft so the edges of each shade still flow together.
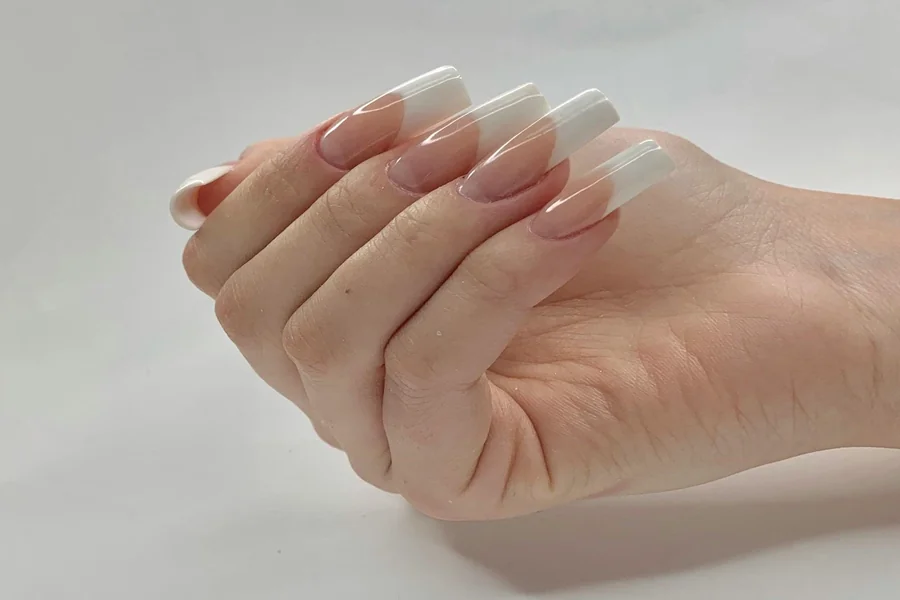
- Nude into soft white. Clean, understated, and ideal for moments when you want a well groomed look without extra embellishment.
- Pale pink into peach. Gentle and warm, perfect for brighter seasons and light fabrics.
- Sky blue into silver. Cool and modern with a soft sheen that suits evenings and minimal outfits.
- Iris into lilac. Dreamy and romantic, an easy match for soft knits and airy dresses.
- Crimson into near black. Striking and powerful, a bold choice for nights out or statement pieces.
- Fresh green into gold. Lively with a touch of richness, a great option for festive moments.
Three color gradients can add depth, especially when you keep the shades in the same family. For example, a pale blush at the base, a mid pink through the middle, and a deeper rose at the tip. Similar values allow the blend to read as a mist of color rather than distinct bands.
How To Pick The Right Finish
The top finish sets the mood of the entire manicure. It also affects day to day maintenance and how visible any small flaws might be.
- Glossy. Crisp, reflective, and bright. It highlights color clarity and works well for fresh, polished looks. It can show wear more easily, so touch ups might be needed if you work with your hands often.
- Matte. Soft, modern, and velvety. It diffuses light and hides minor imperfections. This finish can make bold shades feel more wearable.
- Shimmer. Glowing without heavy sparkle. It brings a subtle radiance that looks beautiful in natural light and helps camouflage tiny chips.
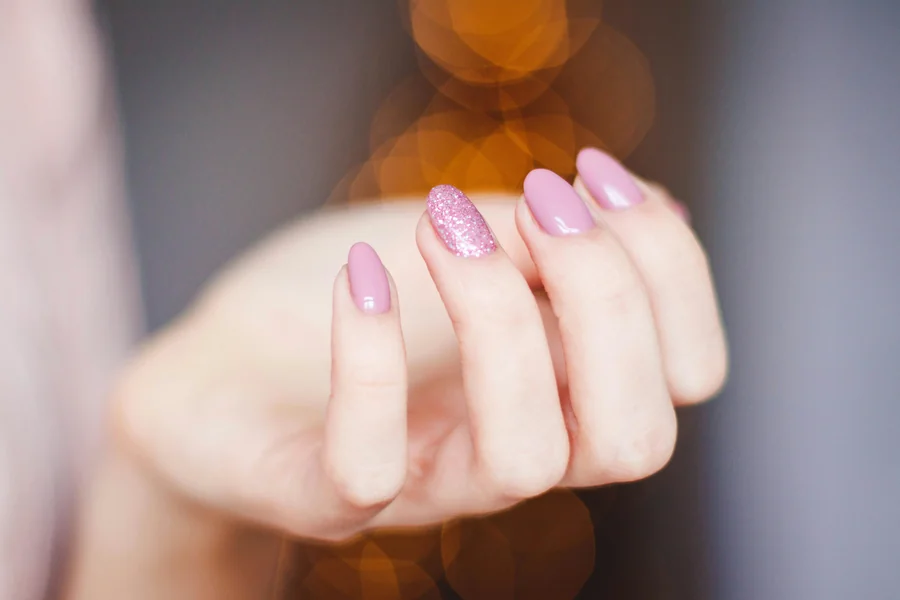
- Glitter tips. Festive and fun. Concentrate the sparkle near the free edge to keep the gradient visible at the base.
- Chrome fade. Futuristic and reflective. Apply sparingly for a mirror like shift that still lets the base color read through.
Match the finish to your habits and wardrobe. If your style leans minimal, a matte or shimmer top coat softens the look. If you love high contrast, glossy or chrome adds impact. Consider maintenance too. Matte and shimmer can be more forgiving between refreshes, while glossy shows small scuffs sooner.
Salon Technique Versus At Home Technique
Both paths can give you a lovely result, and the best choice depends on your goals, time, and comfort level with tools.
In a salon, technicians often use sponges, brushes, airbrushing, or a combination to achieve an even fade. Layers are sealed to enhance longevity and shine. The advantage is consistency from nail to nail and a smooth gradient that looks refined up close. If you want quick, near perfect results, professional work saves learning time.
At home, you can create the effect with patience. You will need two or three complementary polishes, a makeup sponge or specialized gradient sponge, a base coat, and a top coat. Paint a thin layer of the lightest shade and let it dry. Apply your chosen colors side by side on the sponge with a slight overlap, then dab lightly from the cuticle area toward the tip. Repeat with thin passes rather than heavy swipes, allowing brief drying time between layers. Clean the skin around the nail with a brush or an orange stick wrapped in cotton. Finish with a generous top coat to melt the layers together visually.
Expect a learning curve. The first attempts might look streaky or patchy. Very light pressure, almost like tapping, and thin coats help. Rotating the sponge slightly between passes can break up visible lines. If you enjoy crafting your own designs and want to save on appointments, the at home route can be very satisfying.
Nail Shapes That Show Off The Gradient
Certain shapes emphasize the transition better because they offer more length or a smooth curve for the color to travel across.
- Almond. Slim and soft at the tip. The fade follows the gentle curve and reads as elegant.
- Coffin. Strong and elongated. The wide surface displays the full journey of the blend.
- Oval. Balanced and natural. The gradient appears even and refined from base to tip.
- Square. Crisp and modern. The straight edge makes the finish look tidy and graphic.
Short nails can absolutely wear gradients. Select lighter pairings and a smaller contrast difference, which visually stretches the nail. Keep the deepest shade toward the free edge to encourage an elongated look. If your routine is hands on, shorter or medium lengths might be the most practical while still giving room for the fade to read clearly.
Application Tips For A Smooth Blend
A soft gradient depends on clean prep, patient layering, and careful product choice. These details help improve the outcome whether you visit a professional or polish at home.
- Prep thoroughly. Remove oils, shape the nails, and push back cuticles. A smooth foundation allows the colors to lay evenly.
- Use a leveling base coat. This reduces ridges so the gradient looks continuous rather than choppy.
- Mind your color order. Place the lighter shade near the cuticle for a softer grow out. Put the darker tone at the tip to define the edge.
- Build in thin layers. Two or three light passes beat one heavy coat. Thin layers are easier to smooth with top coat.
- Roll the sponge. A gentle rolling motion reduces harsh lines and helps the shades mingle.
- Let layers settle. Give a short drying moment between dabs so the sponge does not pull up wet polish.
- Top coat generously. A floating stroke with a slightly thicker top coat helps melt the blend visually. Avoid pressing the brush into the color.
- Clean edges last. Seal the color first, then refine sidewalls and cuticle lines with a small brush dipped in remover.
Finish Enhancements Without Hiding The Gradient
Extras can elevate the look as long as they do not overpower the fade. Keep embellishments minimal so the transition stays visible.
- Fine line art. A delicate stripe along one side or a thin arc at the base adds structure without covering the blend.
- Tiny accents. One or two small stones near the cuticle bring sparkle while keeping the color shift in focus.
- Negative space. Leave a slim clear crescent at the base to highlight the gradient start.
- Soft foil. A whisper of foil at the tip or along the sidewall can add texture while letting the fade shine.
Seasonal Ideas To Refresh Your Palette
Because the technique is timeless, it adapts beautifully through the year. Refreshing the palette keeps the look new without changing the method.
- Spring. Petal pink into peach, mint into soft cream, or lavender into lilac for a cloudlike mood.
- Summer. Coral into sun warmed rose, turquoise into seafoam, or lemon into buttercream for a bright and breezy feel.
- Autumn. Terracotta into burnt sienna, olive into moss, or plum into fig for a cozy richness.
- Winter. Icicle blue into pearl, charcoal into dove grey, or deep wine into black cherry for depth and polish.
Care Tips To Keep The Gradient Fresh
Good habits extend the life of your manicure and preserve the softness of the blend.
- Start with clean, dry nails. Any residue can cause lifting.
- Use a strong base coat. It anchors the color and smooths the surface.
- Seal with a quality top coat. Reapply a thin layer every few days to maintain gloss or a soft matte sheen.
- Limit long hot water exposure. Heat can soften layers and speed chipping.
- Wear gloves for chores. Detergents and cleaning products can dull the finish.
- Apply cuticle oil daily. Hydrated skin frames the nails and reduces peeling.
- Address chips early. A quick patch with a thin clear coat prevents larger lifts.
- Do not pick or peel. Lifting removes layers and roughens the nail plate.
With mindful care, the blend can stay smooth and attractive for an extended period. A subtle refresh with top coat helps revive the look between full redos.
Troubleshooting Common Ombre Issues
Even simple designs can present small challenges. Here is how to resolve them without starting over.
- Harsh lines where colors meet. Apply a thin mid tone between shades or add one more light sponge pass with the colors slightly overlapping.
- Patchy or bare spots. Let the layer set for a moment and dab again with minimal pressure. Finish with a floating top coat to blur texture.
- Sponge marks. Use a finer cell sponge and moisten it slightly before applying polish. The smaller pores reduce visible stippling.
- Color bleeding at the cuticle. Protect the skin with a peel off barrier or petroleum jelly before sponging. Clean up after sealing the color.
- Dullness after top coat. Apply a second thin layer of top coat or switch to a quick dry formula that levels better.
Gentle Removal To Protect Natural Nails
How you remove the manicure sets the stage for your next set. Be patient to keep nails strong.
- Soften with remover. Use cotton and non aggressive remover. Hold it on the nail until the polish loosens.
- Wipe, do not scrape. Glide the cotton off in one direction. Avoid sharp tools that can gouge the plate.
- Hydrate after. Wash hands, apply cuticle oil, and follow with a nourishing hand cream.
Why This Look Suits So Many Styles
The gradient carries an understated elegance that pairs with nearly everything. It has presence without extra ornaments, so it complements patterns, solids, and textures. It can be made airy for daytime or intensified for evening just by changing saturation and finish. Because the technique is consistent, you can swap shades with the seasons or your wardrobe while keeping the same process.
If you want a manicure that feels calm yet expressive, gradients deliver. They let you show personality through color choice and placement while maintaining a soft overall effect. You can keep it classic or experiment with bolder tones. Either way, the fade gives structure to the design and keeps it feeling elevated.
Step By Step At Home Gradient Guide
- Prep. Shape, buff lightly, and cleanse the nail plate. Push back cuticles and remove oils.
- Base coat. Apply a thin leveling base and let it dry fully.
- Anchor shade. Paint the lightest color as a thin layer. This sets the tone for the blend.
- Sponge setup. On a makeup sponge, paint stripes of each shade with a small overlap. Keep the stripes slightly wider than your nail.
- Dab softly. Tap the sponge onto the nail with very light pressure. Work from the cuticle area toward the tip.
- Build layers. Let the layer set, then repeat with thin passes until the gradient looks even.
- Clean edges. Remove excess from the skin with a small brush and remover.
- Top coat. Float a generous layer to smooth the surface and unify the colors.
Adjust placement as needed. If the tip looks too dark, shift the sponge upward slightly on the next pass to pull more of the lighter shade toward the end.
Frequently Asked Questions
What are ombre nails
They are manicures where one shade blends smoothly into another, creating a soft gradient across the nail.
How long does this manicure usually last
With mindful care, a gradient manicure can stay looking good for about ten to fourteen days.
Can beginners create this look at home
Yes. With patience, thin layers, and light pressure, a first time gradient can look lovely. Technique improves quickly after a few tries.
Do light colors work better than dark ones
Both can look beautiful. Light shades bring a gentle mood, while deeper tones add drama. Choose the intensity that fits your style.
Is this style suitable for short nails
Absolutely. Lighter blends and smaller contrast differences can make short nails appear longer and more refined.
How often should I redo the design
Refreshing every two weeks keeps the gradient clean and the finish crisp.
Does the gradient technique damage natural nails
No. When applied and removed with care, the process is gentle. Avoid peeling and use nourishing products during removal and after.
Can I add nail art on top of the fade
Yes. Minimal accents like fine lines or a single small stone enhance the look without hiding the gradient.
Final Thoughts
Ombre nails remain a favorite because they balance ease with artistry. The technique is simple, yet the result looks soft and considered. You can tune the colors for any season, match the finish to your wardrobe, and pick a shape that highlights the fade. Whether you head to a salon for a seamless result or build the skill at home, this style brings a gentle elegance that works for every day and for special moments. If you want a manicure that expresses personality without feeling loud, a smooth gradient is a choice that rarely disappoints.